Saturday, November 26, 2011

Hummingbird Cake (does not contain actual birds)

For Kathy. (original recipe from BH&G magazine Febraury 2008)


Prep 65 min. Bake 30 min. Cool 2 hr Oven 350 degrees


INGREDIENTS for cake
3 eggs, lightly beaten
3 cups all-purpose flour
2 cups sugar
1 Tbsp. baking powder
1 tsp. salt
1/4 tsp. ground cloves
2 cups mashed bananas (about 5 medium)
1 cup cooking oil
1 1/2 tsp. vanilla
2 cups peeled, shredded uncooked sweet potatoes (about 1/2 lb.)
1 8-oz. can crushed pineapple, drained


PREPARATION
1. Let eggs stand at room temperature 30 minutes, Preheat oven to 350 F. Grease three 9-inch round cake pans. (I used 4 8-inch). Line bottoms with waxed paper. Grease & flour paper, set aside.
2. In bowl combine flour, sugar, baking poweder, salt, and cloves. Sitr in bananas, oil, eggs, and vanilla until moist and thick. Stir in sweet potatoes and pineapple. Spread evenly into prepared pans.
3. Bake 30 minutes or until pick inserted in center comes out clean. Cool in pans on wire rack 10 minutes. Removes pans. Peel off paper. Cool completely.
4. Prepare Caramel Butter Frosting. Place one layer, flat side up, on plate. Spread top only with 1 1/4 cups frosting. Stack and frost remaining layers. 


Caramel Butter Frosting
In large sauce pan melt 1 cup butter; add 2 cups packed brown sugar. Bring to boiling over medium heat; stirring constantly. Cook and stir 1 minute; cool 5 minutes. Whisk in 1/2 cup milk until smooth. Whisk in 6 cups powdered sugar until smooth. Use at once; frosting stiffens as it cools.


*don't buy store frosting. It doesn't work with this cake. This frosting really seals in the moist goodness of the cake. 


Bake it. Enjoy it. Take pictures and share! 
Kathy's Hummingbird Cake

Sunday, June 26, 2011

Southern Biscuits

Tonight I made a "honey I'm sorry" dinner for my husband. We had a fight. I was wrong. I needed to cook. He needed to eat. So I made biscuits. And this time, they weren't just good. They were hell-a good. I can't count how many times I've tried to make biscuits & they never turned out quite right. Too hard, no taste. But these were good. And you call them Southern because they use shortening (AKA Crisco) the good stuff. Not butter (Sorry Paula). I was so excited I wanted to share my recipe. Hope you like it. Hope you bake them. Hope you enjoy them with a slice of onion like a good southerner. 
p.s. I'm always amazed when I finish off a can of Crisco. So much so I took a picture. I had to use my fingers and scrap enough out of the can for the 1/2 cup I needed. Which brings me to....

INGREDIENTS:
2 cups flour
4 teaspoons baking powder
3 generous teaspoons of sugar ( a tablespoon is perfectly acceptable)
1/2 teaspoon salt
1/2 cup shortening
1 egg
2/3 cup milk 

Step 1:
Combine dry ingredients (flour, baking powder, sugar and salt). 
Step 2:
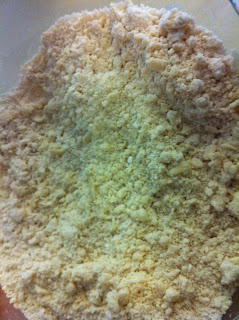
Cut in shortening until your flour + shortening = coarse crumbles. I use my hands for the majority of mixing this recipe. 

Step 3:
Beat egg & milk together. Here's the exception; please use a fork for this one.
Step 4:
Pour wet into dry and combine until moistened. I didn't take a pic of the wet into dry but I did of my hands. Not sure why. But I did. So you get to see it. Purdy.
Step 5:
Plop your dough out onto a well floured surface. Time for a sentimental break....it wasn't until we moved to Kentucky that I really started to enjoy cooking. I had mentioned this to my grandparents on occasion in my letters. During our first visit back home to SC my grandpa gave me his rolling pin, mat, and biscuit cutter. See, my grandpa is famous for his biscuits at his church. Once a month he makes them for the men's breakfast. If my house were on fire I'd save these before the family bible. (OK, the family bible isn't at my house but you get the point).


Step 6:
Knead your dough about 4-5 times. You don't want to over work it. We ain't makin' bread. We're makin' biscuits to get your man to forget what a butt you were 3 hours ago. Once you do that, roll them out to about 3/4 inch thick. You want to be able to cut as many biscuits as you can from the first roll. The more you handle it, the tougher your biscuits will be.
Step 7:
Place them on a lightly greased baking sheet. Brush tops with milk. Bake at 450 degrees for 8-10 minutes.


That's it. Lovely biscuits. I like them with onion. In the morning I'll have them topped with butter and honey. Heaven on a plate ya'll.


Tuesday, June 7, 2011

Baby Shower Gifts

 Long story short, I posted a few pictures on Facebook a few weeks back of some Pee Pee Tepees I had made for a friend to take to a baby shower. I casually said if anyone needs a baby shower gift message me. 
Well, a co-worker from my FOX days did! And I had the wonderful opportunity to make some very special gifts for her sister-in-law-to-be. I can't tell you how much I loved picking out the fabric to go with her theme (giraffes) & carefully measuring, cutting, and sewing her gifts together. Just knowing a new mom would open the box & use these with her new baby boy made the project so special. 
Maybe it's me wishing I was the one having a new baby, maybe it's me being pretty proud of my new skills, I don't know. But I really loved this project and I'm going to start my Etsy shop soon so I can keep it up! I'm marketing to the late-20-something gal who's friends are having babies now but they have no idea what to buy for the shower & would rather go to the DMV than Babies-R-Us.
Here are a few pics I took with my iphone. Bums me out a little that the color is a little squirrely.

Reversible baprons (bibs with more coverage)
They really are pretty and bright, not greenish and dull like they look here.

p.s. have you ever made your own bias tape? It's hard horrible awful!
Fancy burp cloths to match! These are the ones you take out in public. Not the ones that get stuck in the couch and sour. (don't side-eye me! You know it's happened to you too!)
 And the Pee Pee Tepees! Wish I had these with Roland.
And check out this really cool thank you/business card Project Envy Girl made me! Check out her blog too. She's crafty with paper, pictures and more! Should have had her take the pictures, I know.  

Wednesday, May 4, 2011

Like winning the Lottery!

Today via Pinterest  I stumbled upon THE. MOST. AWESOME. BLOG. EVER. It's called "Craftiness is Not Optional" and it's author is one heck of a how-to gal. 
I've only spent about 30 minutes 45 minutes on her site and I've found tons of things I must do right now.
Everything from Barbie skirts to Baprons (trust me, adorable and genius!)
There is just so much to do & learn here. I can't wait to get started. This may finally be the site that takes my sewing to another level. Button holes? Zippers? Heck yeah, I'm making my own bias tape baby!
So what blogs are in your favorites tab? This one is now at the top of mine.


Friday, April 22, 2011

Crafty Ladies

Earlier this month I helped lead the ladies of Encounter Church's very first ladies craft night. Our skill levels ranged from beginner to expert but it didn't matter. These crafts were super fun, super easy and super cool!
  
Lentils + foam wreaths + hot glue = split pea spring wreaths.
Polka dots
 Letter painting fun.
Crafty company.
 Good times with glue guns.
 Pretty and crafty! Double trouble.
 That's my blue "W" back there. I dirtied it up with sandpaper for a shabby chic look.
 Paula Deen's cupcake stencils were the perfect size!
 Already looking forward to the next Craft Night!

Tuesday, April 19, 2011

Tutu cute!

First, I am so sorry it's been 415 years since my last post. Heck, I bet no one even checks my blog anymore. But I wanted to share my latest project anyway! 


With a lot of help getting started from Pink Grandma, I've made Marlowe's very first homemade tutu! My child dresses like she's a weird combination of Punky Bruster, Blossom and Lady GaGa (her inappropriate favorite). I have no idea where she gets it.

Action shot!
And yes, that is a Big Bass Pro Shop t-shirt she's sporting with the hot pink and yellow tutu. Very classy. I'm seriously considering an Etsy shop. What do you think? Leave me a comment & let me know.